I decided to start the new year off by realizing an idea that I have been sitting on for quite some time. With the move to a new (larger) growing space, I now finally have the room (and the time) to do this - a recirculating water table for my phrags! This idea is based off something I saw on the Gore Orchid Conservatory site years ago (http://goreorchids.com/CatalogAndInfo/Phrag-culture-SH.html). A lot of people grow their phrags (very successfully) standing in water trays. The idea here is to have a constantly recirculcating layer of water from a reservoir, some of the advantages being:
1) constant water level (since the water level is dependant on the reservoir and not on tray evaporation).
2) water stays cleaner (moving water doesn't get nasty nearly as fast as stagnant water).
3) much larger volume of water doesn't accumulate minerals as fast and doesn't need to be changed out as often. So, less maintenance.
I am all about things that automate/lower maintenance so I have more time to actually appreciate and enjoy my plants. Ok, lets get building!
I picked up a shallow, long, and narrow storage tub to use as the base. I am using flexible vinyl tubing for all the plumbing since this will make it easier to take apart for cleaning and also make it easier to shift and move as necessary (flexible). I will attach the tubing to the tub using barb fittings. But first, I needed a way to attach the barb fitting to the the tub! Looking around online and in various hardware stores, I was taken-aback by how expensive PVC bulkhead fittings are ($10-$20/fitting depending on the size)! However, it turns out they are actually quite easy to make from some very inexpensively obtained parts. All you need to make them is a pair of male/female thread-slip CONDUIT* adapters in whatever size you want and an o-ring of the appropriate size. The adapters are about $0.50-$0.70 depending on size. The o-rings I made out of some spare rubber I had laying around. For this particular build, the inlet hose is going to be 3/4 in. ID and the passive overflow is going to be 1 in. I arrived at these sizes since the pump I am using is rated at ~350 gallons per hour for a 2 foot lift. The one inch outlet should easily be able to drain at this rate and keep up with the flow.
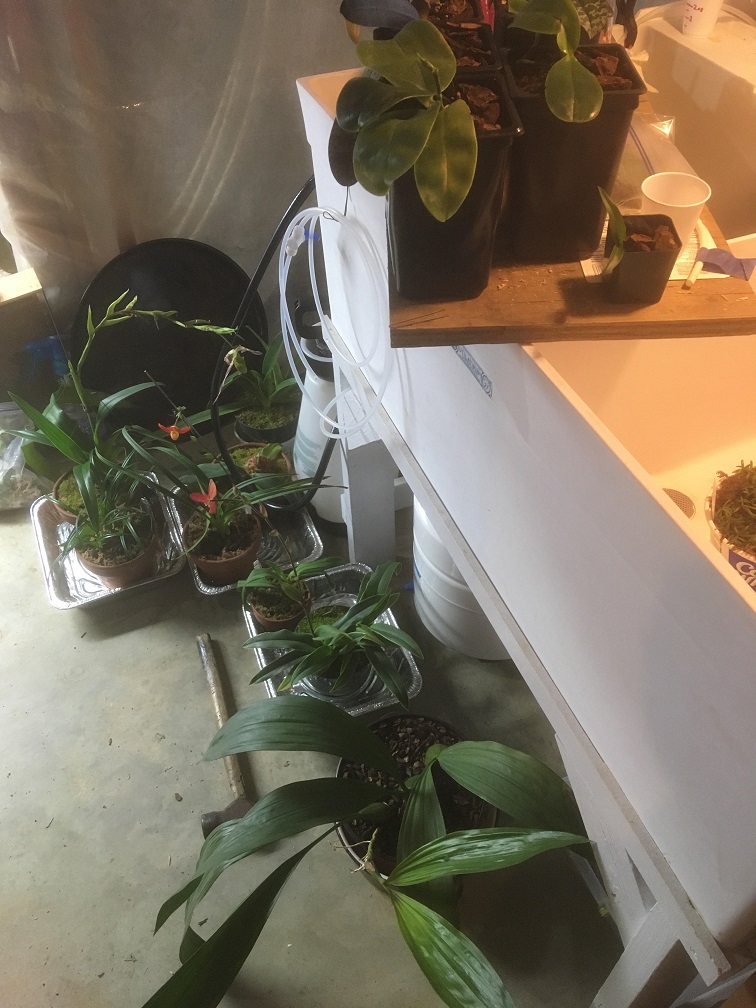
Step one (move everybody off the phrag shelf and test the tub for fit):
Everybody off!
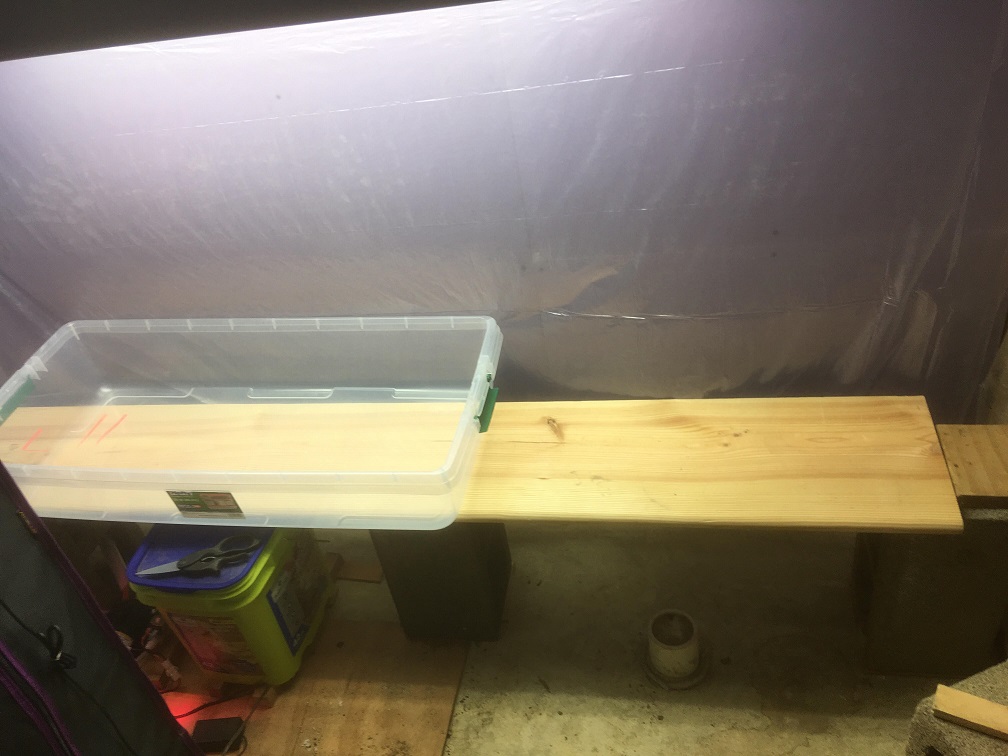
Adjust the shelf so the tub is centered:
Step two (make and install the bulkhead fittings):
Adapters:
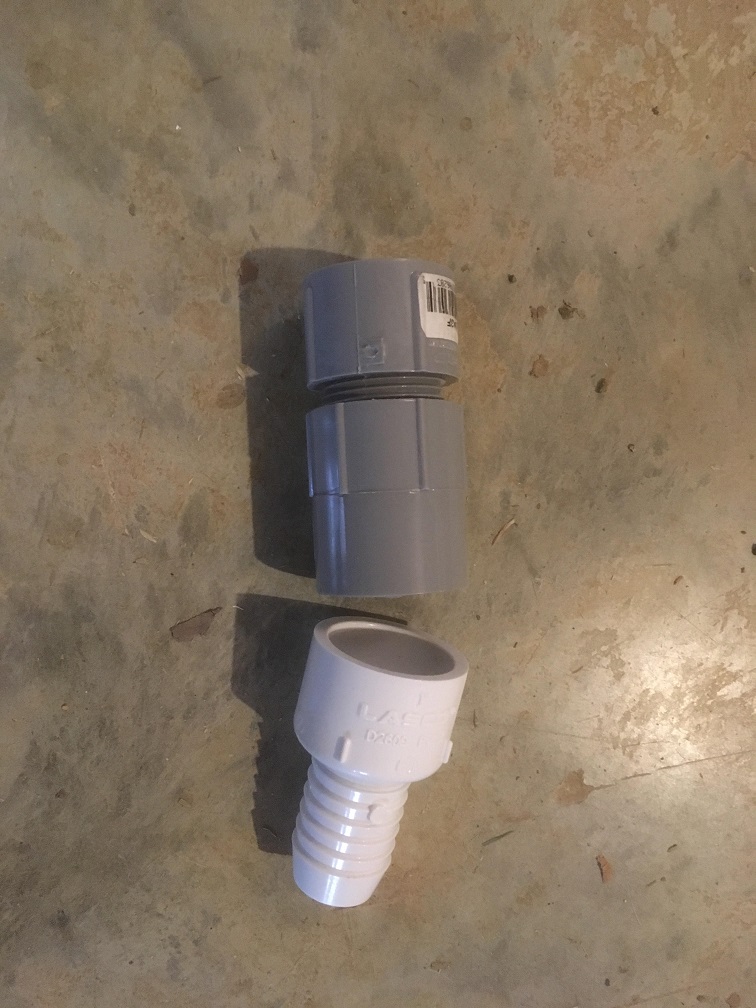
Pieces - I am joining the slip components using a small piece of appropriately sized PVC pipe. I also cut off the long (slip) end of the female adapter since this will not be required and makes the whole build more compact.
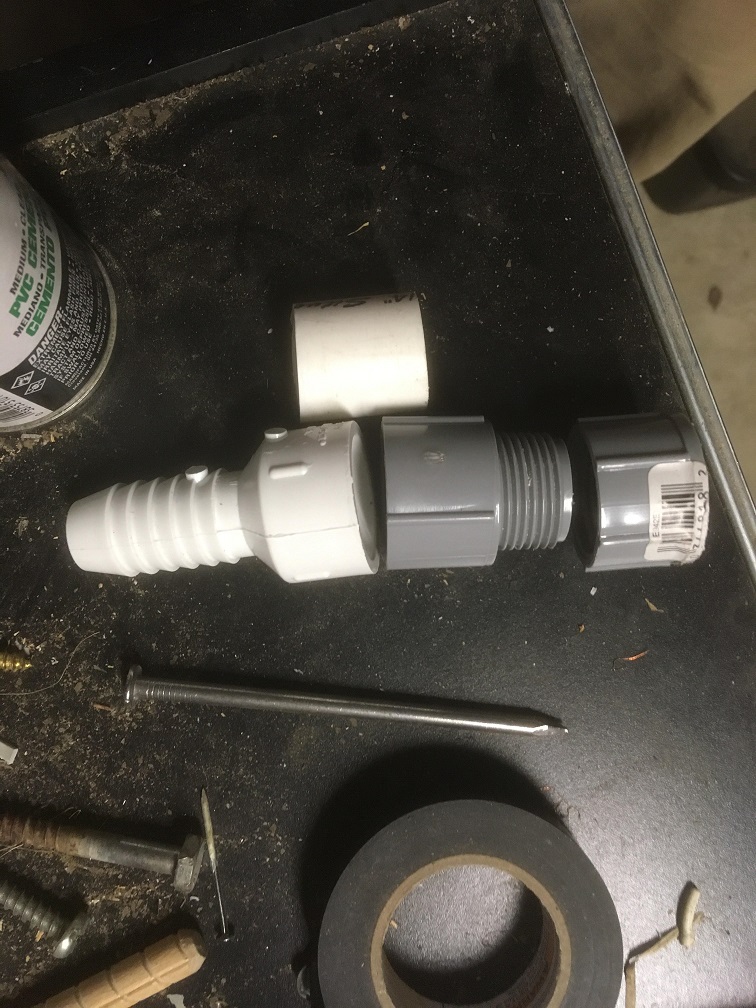
Finished bulkheds - forgot to take pictures of making the gaskets, but I assume everyone knows how to cut a circle
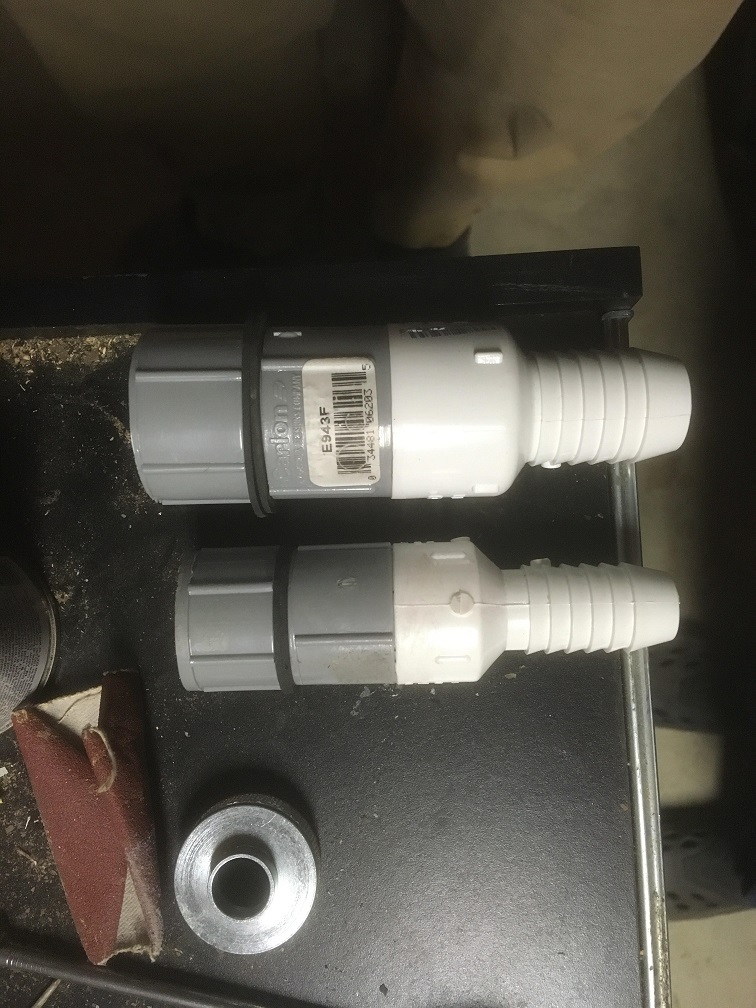
Installing: Cut holes just slightly larger than the threads on the male adapter and popped them in.
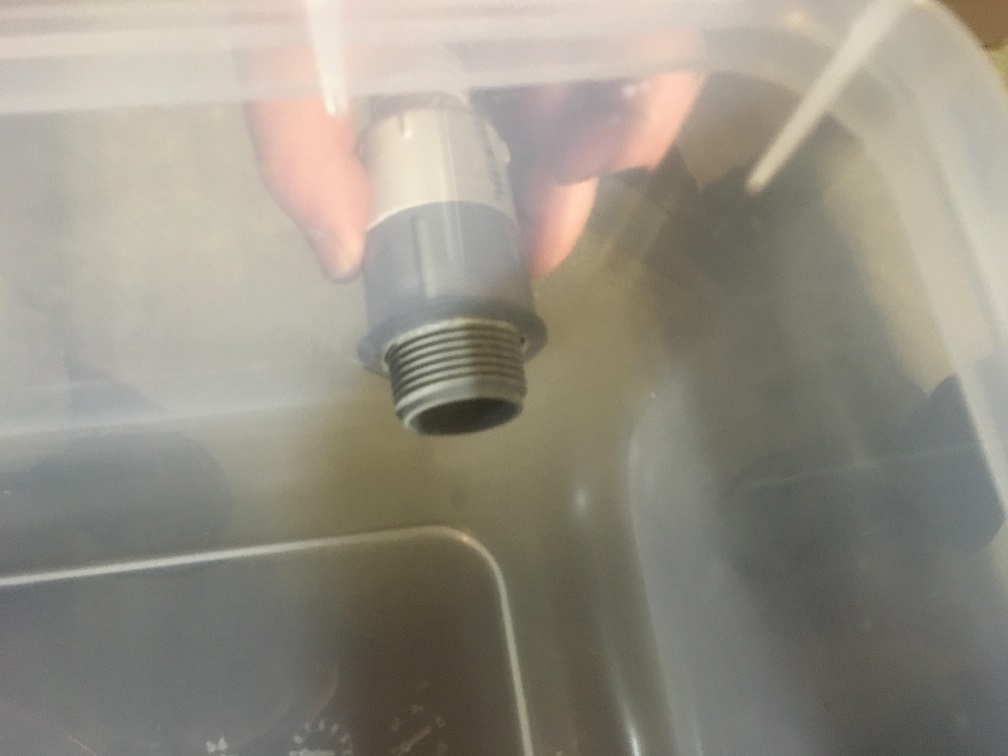
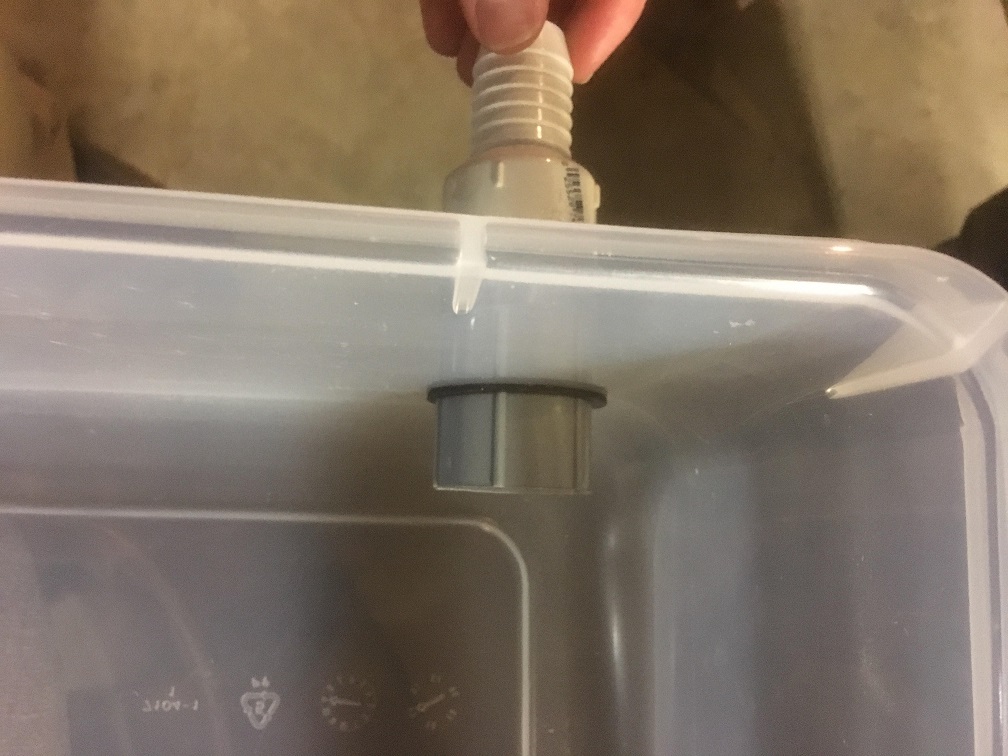
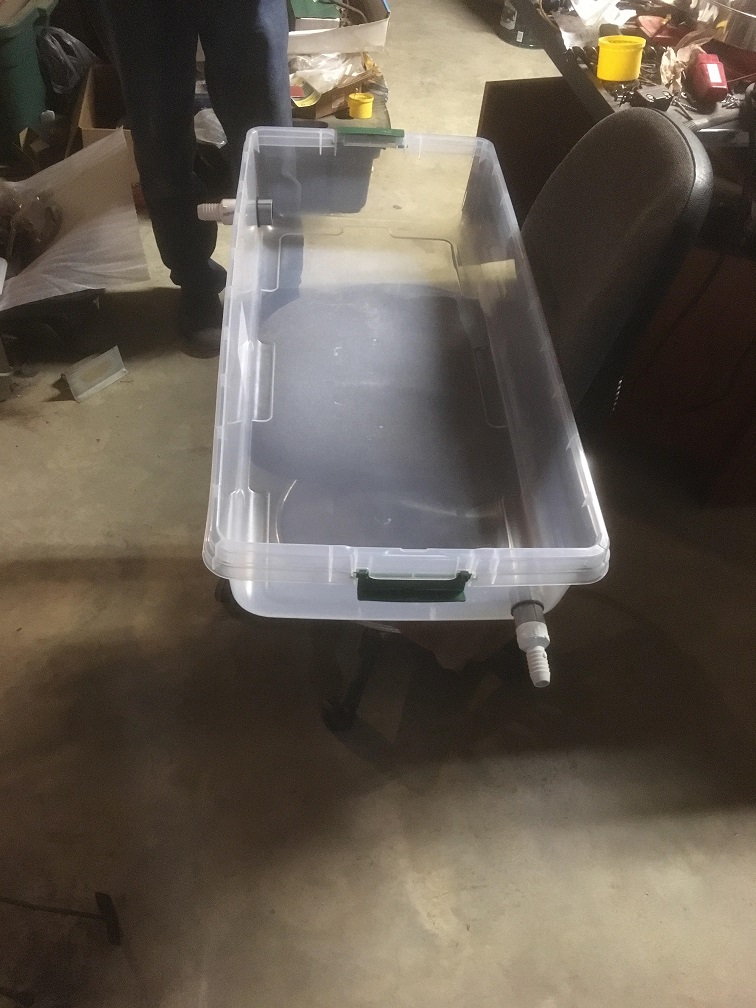
Step three (the test):
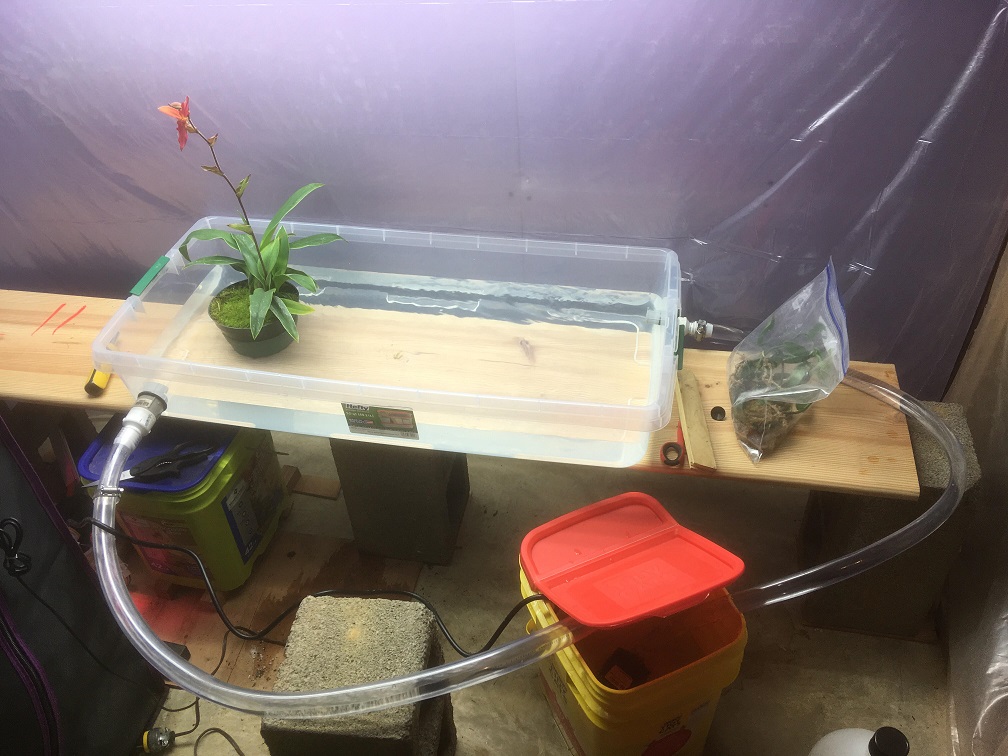
I put the tubing on and it was a bit stiffer than I expected, so I will probably go ahead and throw some elbows on there to help route the tubing more easily. Works pretty well though! The static water line sits right above the 1-inch overflow. Because the side of the tub was curved near the bottom, I had to drill the hole for this about 1-1.5 in above the bottom of the tub. So the water is a bit deep (covers about 2/3 of the pots). So I may have to put a tray in there to raise them up a bit. If I had been able to find a tub with straight sides, I could have drilled the hole much lower and avoided this bit.
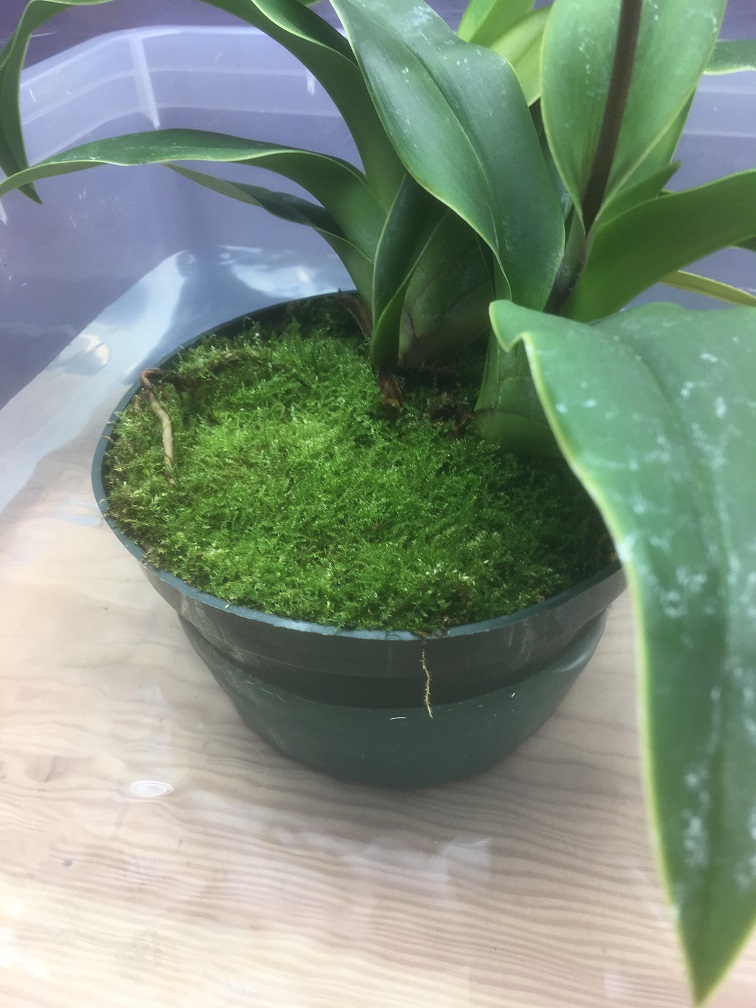
I am going to see about adding elbows this afternoon to get it permanently in place and running.
I can't say I am disappointed in this build. The deeper than anticipated water is an easily fixed issue and a better problem to have then not being deep enough. The whole thing only cost me about $45 ($15 for the tub and ~$30 in sundry plumbing stuff). The pump I had laying around already for aquarium stuff, but these can be bought for around $20. So with the pump, the total build cost is around $65. The reservoir I am using is an old cat-litter bucket that holds around 5 gallons.
Hopefully my phrags find this a great way to start out the new year!
*Note: It is very important to get CONDUIT adapters (in the electrical section) rather than getting PLUMBING adapters. Although they superficially look very similar, plumbing adapters have tapered threads which don't allow you to screw them together completely so the surfaces touch. Conduit adapters have straight threads and you can easily screw them together completely to get a good seal.
1) constant water level (since the water level is dependant on the reservoir and not on tray evaporation).
2) water stays cleaner (moving water doesn't get nasty nearly as fast as stagnant water).
3) much larger volume of water doesn't accumulate minerals as fast and doesn't need to be changed out as often. So, less maintenance.
I am all about things that automate/lower maintenance so I have more time to actually appreciate and enjoy my plants. Ok, lets get building!
I picked up a shallow, long, and narrow storage tub to use as the base. I am using flexible vinyl tubing for all the plumbing since this will make it easier to take apart for cleaning and also make it easier to shift and move as necessary (flexible). I will attach the tubing to the tub using barb fittings. But first, I needed a way to attach the barb fitting to the the tub! Looking around online and in various hardware stores, I was taken-aback by how expensive PVC bulkhead fittings are ($10-$20/fitting depending on the size)! However, it turns out they are actually quite easy to make from some very inexpensively obtained parts. All you need to make them is a pair of male/female thread-slip CONDUIT* adapters in whatever size you want and an o-ring of the appropriate size. The adapters are about $0.50-$0.70 depending on size. The o-rings I made out of some spare rubber I had laying around. For this particular build, the inlet hose is going to be 3/4 in. ID and the passive overflow is going to be 1 in. I arrived at these sizes since the pump I am using is rated at ~350 gallons per hour for a 2 foot lift. The one inch outlet should easily be able to drain at this rate and keep up with the flow.
Step one (move everybody off the phrag shelf and test the tub for fit):
Everybody off!

Adjust the shelf so the tub is centered:

Step two (make and install the bulkhead fittings):
Adapters:

Pieces - I am joining the slip components using a small piece of appropriately sized PVC pipe. I also cut off the long (slip) end of the female adapter since this will not be required and makes the whole build more compact.

Finished bulkheds - forgot to take pictures of making the gaskets, but I assume everyone knows how to cut a circle

Installing: Cut holes just slightly larger than the threads on the male adapter and popped them in.


Step three (the test):

I put the tubing on and it was a bit stiffer than I expected, so I will probably go ahead and throw some elbows on there to help route the tubing more easily. Works pretty well though! The static water line sits right above the 1-inch overflow. Because the side of the tub was curved near the bottom, I had to drill the hole for this about 1-1.5 in above the bottom of the tub. So the water is a bit deep (covers about 2/3 of the pots). So I may have to put a tray in there to raise them up a bit. If I had been able to find a tub with straight sides, I could have drilled the hole much lower and avoided this bit.

I am going to see about adding elbows this afternoon to get it permanently in place and running.
I can't say I am disappointed in this build. The deeper than anticipated water is an easily fixed issue and a better problem to have then not being deep enough. The whole thing only cost me about $45 ($15 for the tub and ~$30 in sundry plumbing stuff). The pump I had laying around already for aquarium stuff, but these can be bought for around $20. So with the pump, the total build cost is around $65. The reservoir I am using is an old cat-litter bucket that holds around 5 gallons.
Hopefully my phrags find this a great way to start out the new year!
*Note: It is very important to get CONDUIT adapters (in the electrical section) rather than getting PLUMBING adapters. Although they superficially look very similar, plumbing adapters have tapered threads which don't allow you to screw them together completely so the surfaces touch. Conduit adapters have straight threads and you can easily screw them together completely to get a good seal.


