The Coryopedilum Chronicles II – Deflasking the old fashioned way
These Chronicles document the deflasking and growing out of 2 flasks each of Paphiopedilum adductum v. anitum, platyphyllum, randsii, rothschildianum and sanderianum. One flask of each has been deflasked “the old fashioned way” as discussed below. The events related to Chronicles III- putting flasks with agar directly into compots, and Chronicles IV- potting deflasked plants, have already taken place- but will be reported over the next week.
Deflasking the old fashioned way means undertaking a process in which you attempt to separate individual seedlings and remove as much agar as possible. The seed pod of an orchid can yield millions of seeds, as fine as dust. Of those millions, a handful may someday reach maturity. The flasking process, as it has evolved over the past 100 years, is intended to provide a commercially viable return on germination. It is the one aspect of orchid cultivation that is completely removed from the natural process. The intent of deflasking the old fashioned way is to, as quickly as possible, get orchids back to a more natural growth cycle.
Additionally, there are many advantages to this approach. For starters, you can easily grade the plants and put plants of similar size and root growth in the same pot- and thus adjust your care of individual compots accordingly to meet specific needs. You can also do a more thorough job of removing plants, or cutting specific leaves, that may be showing signs of rot that could spread rapidly if unchecked. This method makes it possible to collect very small seedlings or protocorm masses that are sprouting- but rootless- and either reflask them or put them in partially sealed containers to maximize potential yield on the flask. And finally, with this method you can pot up compots that are easier to break up later for individual potting.
The trouble is that the “old fashioned way” hearkens back to a time when Cattleyas and Phalaenopsis drove much advice on growing techniques. Paphiopedilums are far more delicate out of flask, plus their rooting works a bit differently at this stage. In flask, the roots of Cattleya and Phalaenopsis Alliance plants are much as the same as in the adult stage. Not so with Paphiopedilums. The first roots, or “flask roots” a Paph generates are relatively thin and wiry- and completely smooth. However, as they grow in flask, Paphs will also often begin to develop thicker and fuzzier roots more akin to what you will see with adult plants. These are obviously crucial, but they are also incredibly weighty relative to the size of the plants, adhere to each other quite strongly, and break quite easily when you are attempting to extract the plants from the agar and each other.
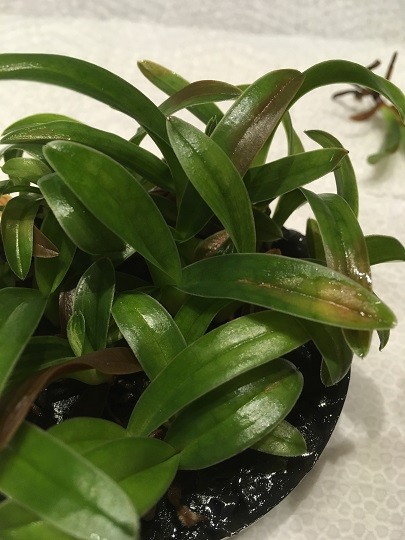
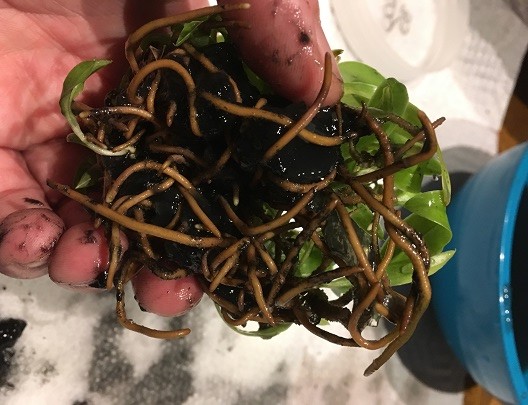
Before we dive into the Paph flasks, let me please show you an example of what I am talking about. Here is a flask of C. trianae. I got this last week from Sunset Valley Orchids. It is above average in terms of root growth, but not exactly uncommon,
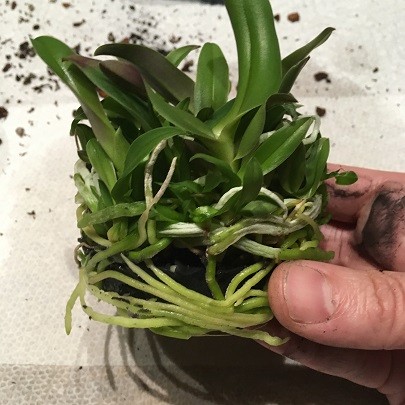
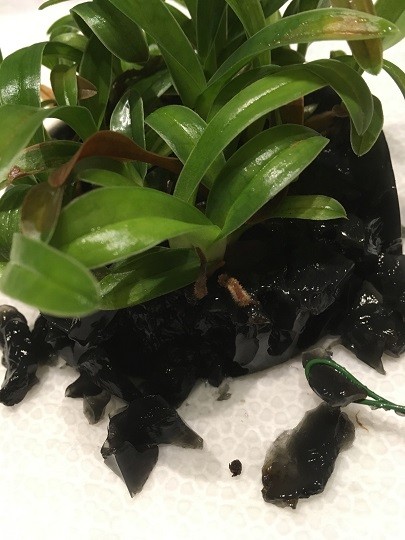
This flask appears quite daunting, but in fact it took about 8 minutes to separate the seedlings individually. The process is quite simple- a brief soak to soften the roots, and then use your fingers to work out all of the agar. Once that is done, slowly but firmly insert a finger up through the middle of the root mass and use your other fingers to pull apart the entire mass on one side leaving you with a long chain of plants as follows,
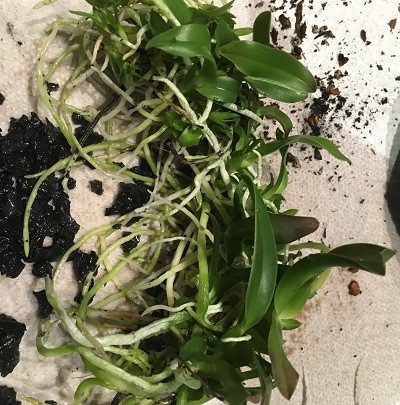
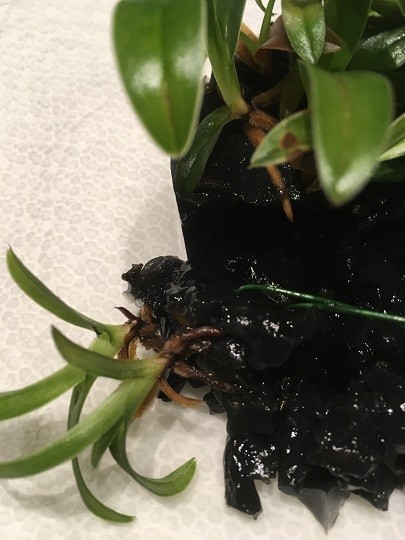
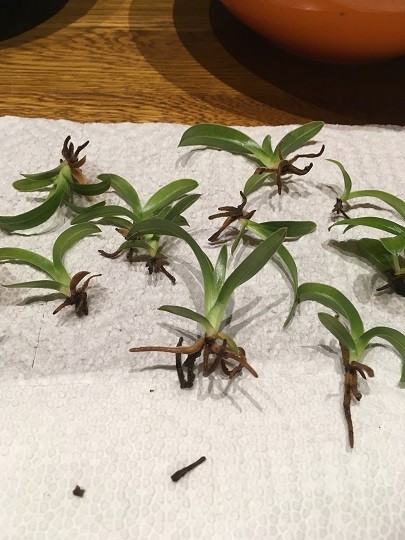
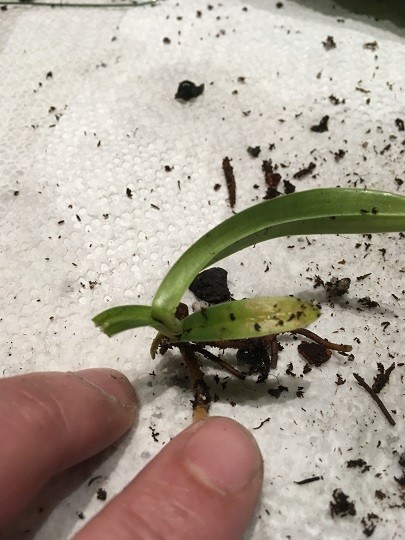
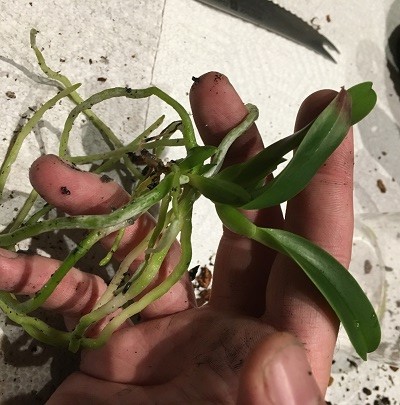
From there, pulling apart the individual plants is quite fast. In this rough process I broke off a total of six roots- all from larger plants which had multiple large roots circling the inner rim of the flask. And here is one of the larger plants to show you that one lost root or two is not a big deal,
The fast and rough process I described with C. trianae above cannot be done with any Paphiopedilum I have ever worked with, and if you tried- you would likely destroy at least half of the plants. To undertake the process of individually separating plants in a Paph flask takes anywhere from 10 to 45 minutes, depending on how many fuzzy roots have grown in and intertwined with each other, and the inevitable root loss even at this slower pace is likely to have a more significant impact on individual plants since the number and size of roots per plant is going to be far less, on average, than for Cattleyas or Phalaenopsis.
Hence, I think, the evolution of the agar-intact compotting process in the orchid world. That will be explored in Chronicles III. For now, I present the old fashioned method because it does have its merits as noted above, and there are times where- in my opinion- it is the only way to go.
One final note before the individual posts on dealing with each species covered in these Chronicles- patience is key to success in the deflasking process, and that begins with working in an environment that is ergonomically suited to you. Deflasking is tedious and detailed work. There is a great deal of satisfaction in pondering and mastering those details, and a great deal of muscle memory skill building that will make the process surprisingly intuitive over time. The best advice anyone can give you is to set up your deflasking area in such a manner that you can work comfortably with minimal physical strain.
Paphiopedilum sanderianum – inspiration for a new tool
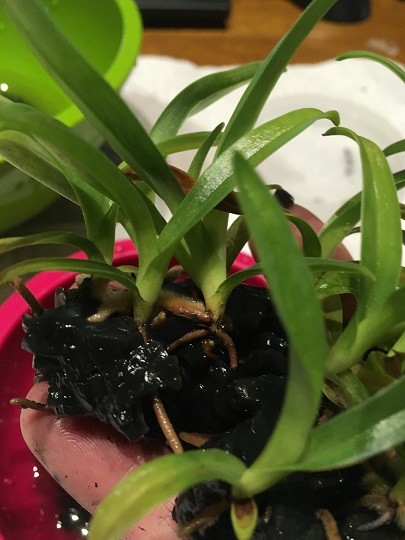
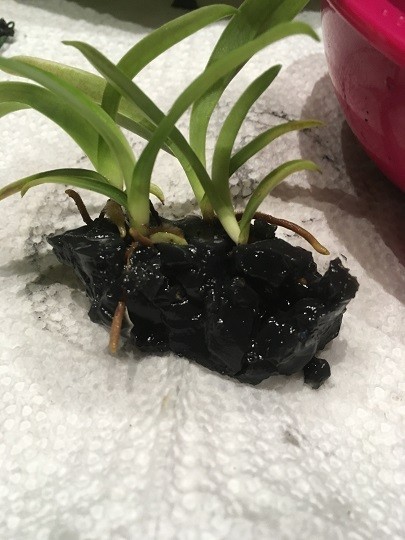
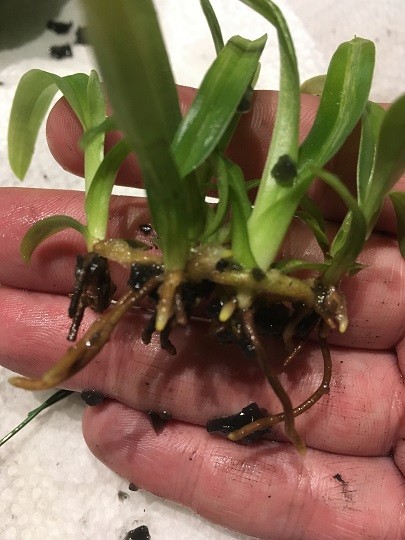
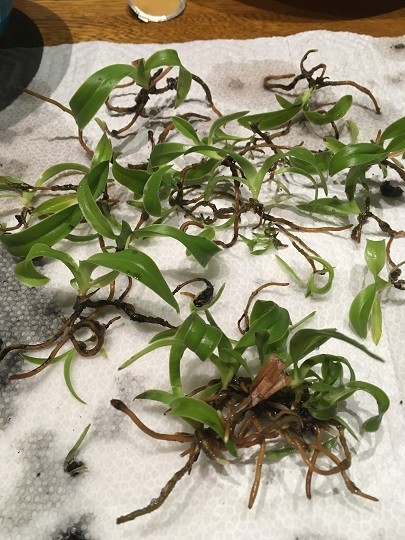
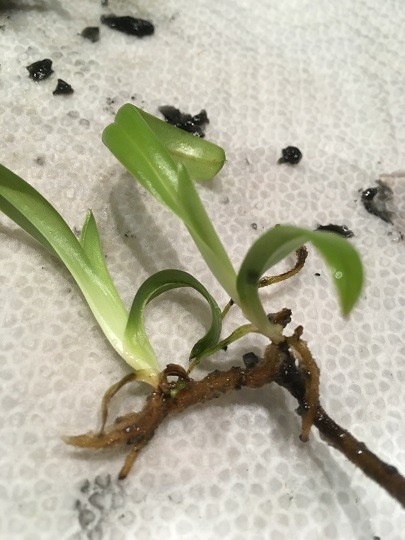
The first Chronicles I ever wrote were for sanderianum, so it seemed a good place to start. And I started off just as I did in the past- using my fingers to gently pull away the agar until I could gently pull apart the mass of plants on one edge to turn a circle of plants into a long chain of plants easier to separate. Here is that process underway,
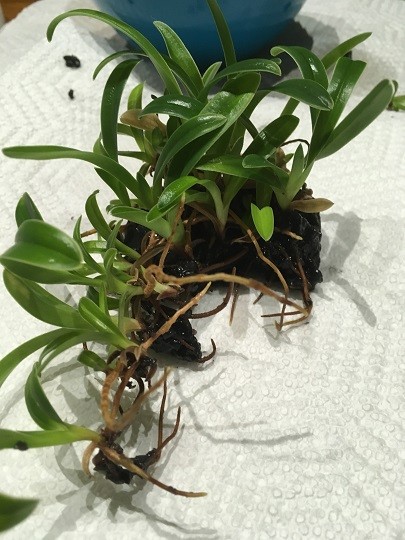
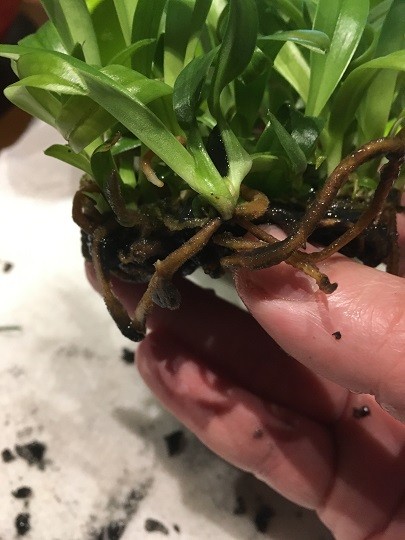
Once I got to that point, I would gently scrape downward with my finger to remove agar from around each individual plant as follows,
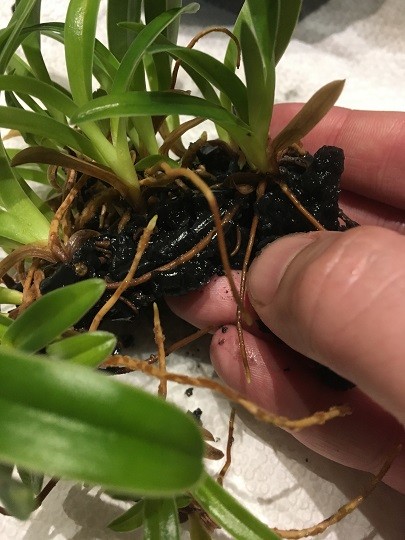
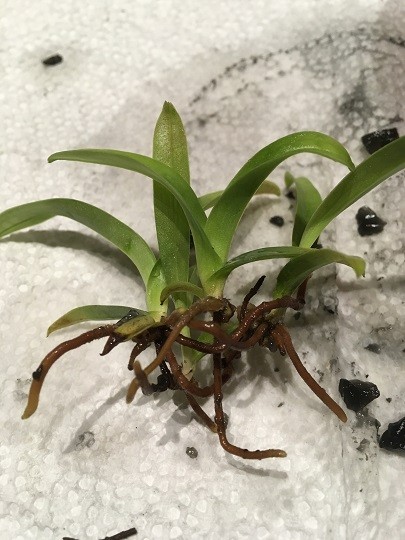
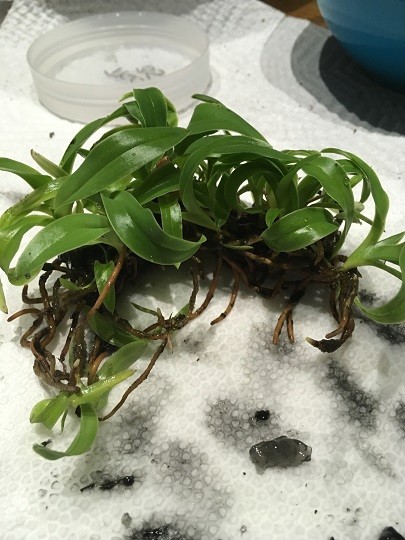
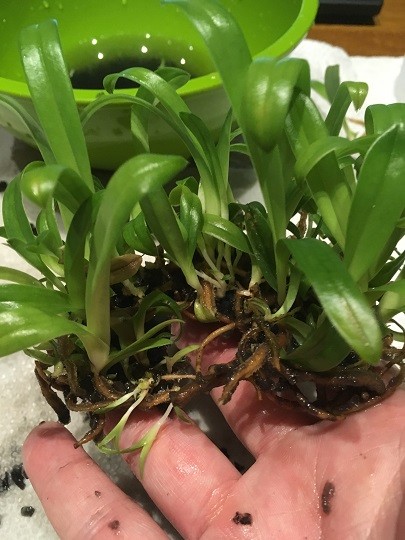
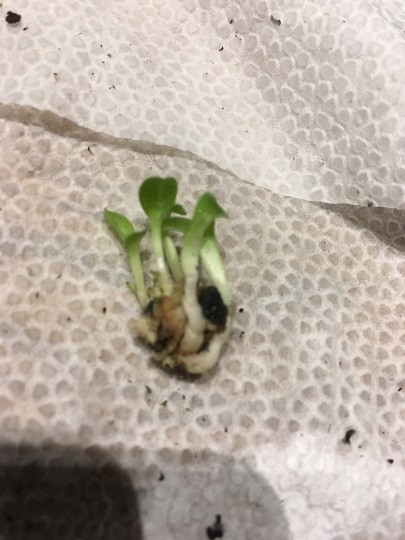
This gave the expected outcome in about 20 minutes time as these plants had mostly flask roots. However, a good number of roots were lost or broken- I would say about a dozen- and so I stopped at this point for a couple of days to really give some thought to how to make the old fashioned way a little better. Happily now that everyone is shipping plants in flask with some filler on top, it is very easy to just remove the filler and take your time getting around to deflasking. That is a huge change in the marketplace actually, all for the better.
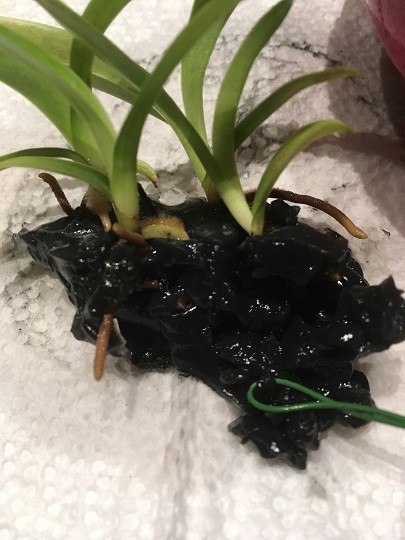
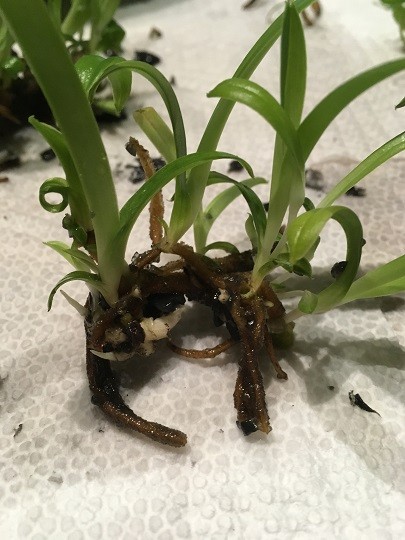
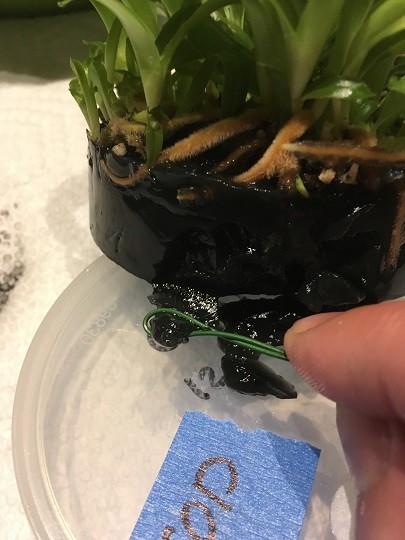
Anyhow- after some thinking- I came up with a homemade tool using a single piece of florist wire. You simply fold over and twist a few inches of the wire- leaving a small loop at the end. This small loop is then used to scrape away agar in smaller quantities. It does go a bit slower, but root loss was negligible for all the rest of the flasks I handled the old fashioned way. A most elegant solution- and here it is in action on the rothschildianum flask,
These Chronicles document the deflasking and growing out of 2 flasks each of Paphiopedilum adductum v. anitum, platyphyllum, randsii, rothschildianum and sanderianum. One flask of each has been deflasked “the old fashioned way” as discussed below. The events related to Chronicles III- putting flasks with agar directly into compots, and Chronicles IV- potting deflasked plants, have already taken place- but will be reported over the next week.
Deflasking the old fashioned way means undertaking a process in which you attempt to separate individual seedlings and remove as much agar as possible. The seed pod of an orchid can yield millions of seeds, as fine as dust. Of those millions, a handful may someday reach maturity. The flasking process, as it has evolved over the past 100 years, is intended to provide a commercially viable return on germination. It is the one aspect of orchid cultivation that is completely removed from the natural process. The intent of deflasking the old fashioned way is to, as quickly as possible, get orchids back to a more natural growth cycle.
Additionally, there are many advantages to this approach. For starters, you can easily grade the plants and put plants of similar size and root growth in the same pot- and thus adjust your care of individual compots accordingly to meet specific needs. You can also do a more thorough job of removing plants, or cutting specific leaves, that may be showing signs of rot that could spread rapidly if unchecked. This method makes it possible to collect very small seedlings or protocorm masses that are sprouting- but rootless- and either reflask them or put them in partially sealed containers to maximize potential yield on the flask. And finally, with this method you can pot up compots that are easier to break up later for individual potting.
The trouble is that the “old fashioned way” hearkens back to a time when Cattleyas and Phalaenopsis drove much advice on growing techniques. Paphiopedilums are far more delicate out of flask, plus their rooting works a bit differently at this stage. In flask, the roots of Cattleya and Phalaenopsis Alliance plants are much as the same as in the adult stage. Not so with Paphiopedilums. The first roots, or “flask roots” a Paph generates are relatively thin and wiry- and completely smooth. However, as they grow in flask, Paphs will also often begin to develop thicker and fuzzier roots more akin to what you will see with adult plants. These are obviously crucial, but they are also incredibly weighty relative to the size of the plants, adhere to each other quite strongly, and break quite easily when you are attempting to extract the plants from the agar and each other.
Before we dive into the Paph flasks, let me please show you an example of what I am talking about. Here is a flask of C. trianae. I got this last week from Sunset Valley Orchids. It is above average in terms of root growth, but not exactly uncommon,
This flask appears quite daunting, but in fact it took about 8 minutes to separate the seedlings individually. The process is quite simple- a brief soak to soften the roots, and then use your fingers to work out all of the agar. Once that is done, slowly but firmly insert a finger up through the middle of the root mass and use your other fingers to pull apart the entire mass on one side leaving you with a long chain of plants as follows,
From there, pulling apart the individual plants is quite fast. In this rough process I broke off a total of six roots- all from larger plants which had multiple large roots circling the inner rim of the flask. And here is one of the larger plants to show you that one lost root or two is not a big deal,
The fast and rough process I described with C. trianae above cannot be done with any Paphiopedilum I have ever worked with, and if you tried- you would likely destroy at least half of the plants. To undertake the process of individually separating plants in a Paph flask takes anywhere from 10 to 45 minutes, depending on how many fuzzy roots have grown in and intertwined with each other, and the inevitable root loss even at this slower pace is likely to have a more significant impact on individual plants since the number and size of roots per plant is going to be far less, on average, than for Cattleyas or Phalaenopsis.
Hence, I think, the evolution of the agar-intact compotting process in the orchid world. That will be explored in Chronicles III. For now, I present the old fashioned method because it does have its merits as noted above, and there are times where- in my opinion- it is the only way to go.
One final note before the individual posts on dealing with each species covered in these Chronicles- patience is key to success in the deflasking process, and that begins with working in an environment that is ergonomically suited to you. Deflasking is tedious and detailed work. There is a great deal of satisfaction in pondering and mastering those details, and a great deal of muscle memory skill building that will make the process surprisingly intuitive over time. The best advice anyone can give you is to set up your deflasking area in such a manner that you can work comfortably with minimal physical strain.
Paphiopedilum sanderianum – inspiration for a new tool
The first Chronicles I ever wrote were for sanderianum, so it seemed a good place to start. And I started off just as I did in the past- using my fingers to gently pull away the agar until I could gently pull apart the mass of plants on one edge to turn a circle of plants into a long chain of plants easier to separate. Here is that process underway,
Once I got to that point, I would gently scrape downward with my finger to remove agar from around each individual plant as follows,
This gave the expected outcome in about 20 minutes time as these plants had mostly flask roots. However, a good number of roots were lost or broken- I would say about a dozen- and so I stopped at this point for a couple of days to really give some thought to how to make the old fashioned way a little better. Happily now that everyone is shipping plants in flask with some filler on top, it is very easy to just remove the filler and take your time getting around to deflasking. That is a huge change in the marketplace actually, all for the better.
Anyhow- after some thinking- I came up with a homemade tool using a single piece of florist wire. You simply fold over and twist a few inches of the wire- leaving a small loop at the end. This small loop is then used to scrape away agar in smaller quantities. It does go a bit slower, but root loss was negligible for all the rest of the flasks I handled the old fashioned way. A most elegant solution- and here it is in action on the rothschildianum flask,
Last edited: