


G
gore42
Guest
Rick's consumer vs. producer post motivated me to start a new thread here that will hopefully help someone out there realize how easy this process is. This is actually a copy of a post I made at the Denver Orchid Society forum last spring if you've seen it before.
If I've left out any important details or made any major mistakes, I hope that you'll let us know!
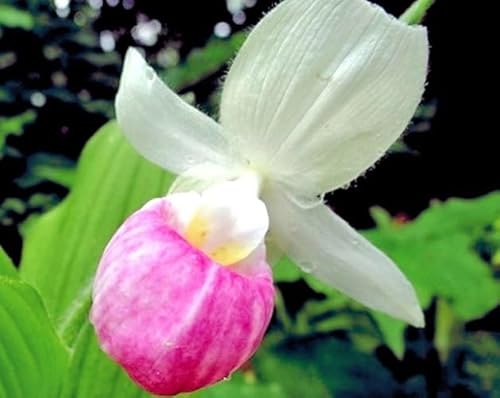
In this example, I'm selfing a Paph fowliei.

The pouch on this bloom was disfigured, and I was going to just cut it off, but this seems like a better use of it. Even though I'm only using one flower here, the process would be the same if two were used.
I suppose the first thing to do is to locate the important parts of the bloom, starting with the pollen. The fertile anthers (pollen) can be found on either side of the staminode. The arrow in the photo below points to one of them.

I usually begin by removing the pollen with a toothpick. On Paphs, they are sticky and will stick to the end of the toothpick with little difficulty. Phrags, on the other hand, aren't so sticky (in my experience). I've heard that some people use honey, others use a little spit to help stick the pollen to the toothpick and then to the stigma. Removal of the pollen can be done later, but I like to do it first; this way, if I'm sloppy and drop the pollen, there's a good chance that it will fall into the pouch, and I won't lose it!

Once the pollen has been removed, the end of the stigma has to be exposed. In slippers, this usually means that the pouch is cut off (though in some cases, I simply cut a hole in the bottom of the pouch for access). This can be done easily with a sterile blade. In the photo below, the two sides of the pouch have been slit, but it is still hanging on.

And with the entire pouch removed, the stigma is revealed.

Now, pick up your toothpick again (with the pollen still attached) and stick the pollen onto the flat, bottom surface of the stigma.


From there, it's just a matter of waiting for the capsule to form. Once you've pollinated the plant, you should label the bud with the cross and the date, then, keep an eye on the ovary of the plant.

If the pollination has been successful, when the bloom begins to brown and wilt, it will not drop off of the plant usually - it will just stay on the ovary and dry out. Also, the ovary will start to swell. The swelling is not as pronounced in Paphs and Phrags as many other species. Phalaenopsis pods grow to be quite large; but Paphs may only double in size.
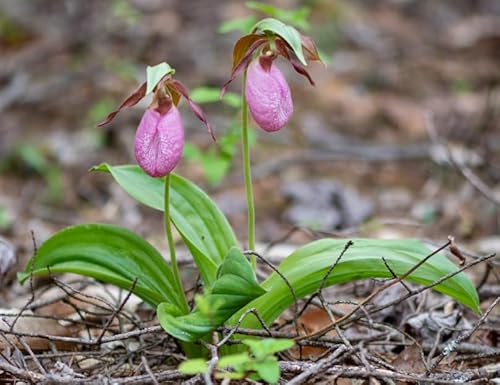
In the photos below, you can see a Paph fowliei pod that was pollinated a bit less than 4 months ago.

And the pod, closer up:

Again, pod development time varies according to species. Some take just a few months, some take about a year, I have been told.
So, I hope that some of you who have just been consumers in the past will decide to give it a try.
- Matt Gore
If I've left out any important details or made any major mistakes, I hope that you'll let us know!
In this example, I'm selfing a Paph fowliei.
The pouch on this bloom was disfigured, and I was going to just cut it off, but this seems like a better use of it. Even though I'm only using one flower here, the process would be the same if two were used.
I suppose the first thing to do is to locate the important parts of the bloom, starting with the pollen. The fertile anthers (pollen) can be found on either side of the staminode. The arrow in the photo below points to one of them.
I usually begin by removing the pollen with a toothpick. On Paphs, they are sticky and will stick to the end of the toothpick with little difficulty. Phrags, on the other hand, aren't so sticky (in my experience). I've heard that some people use honey, others use a little spit to help stick the pollen to the toothpick and then to the stigma. Removal of the pollen can be done later, but I like to do it first; this way, if I'm sloppy and drop the pollen, there's a good chance that it will fall into the pouch, and I won't lose it!
Once the pollen has been removed, the end of the stigma has to be exposed. In slippers, this usually means that the pouch is cut off (though in some cases, I simply cut a hole in the bottom of the pouch for access). This can be done easily with a sterile blade. In the photo below, the two sides of the pouch have been slit, but it is still hanging on.
And with the entire pouch removed, the stigma is revealed.
Now, pick up your toothpick again (with the pollen still attached) and stick the pollen onto the flat, bottom surface of the stigma.
From there, it's just a matter of waiting for the capsule to form. Once you've pollinated the plant, you should label the bud with the cross and the date, then, keep an eye on the ovary of the plant.
If the pollination has been successful, when the bloom begins to brown and wilt, it will not drop off of the plant usually - it will just stay on the ovary and dry out. Also, the ovary will start to swell. The swelling is not as pronounced in Paphs and Phrags as many other species. Phalaenopsis pods grow to be quite large; but Paphs may only double in size.
In the photos below, you can see a Paph fowliei pod that was pollinated a bit less than 4 months ago.
And the pod, closer up:
Again, pod development time varies according to species. Some take just a few months, some take about a year, I have been told.
So, I hope that some of you who have just been consumers in the past will decide to give it a try.
- Matt Gore


")