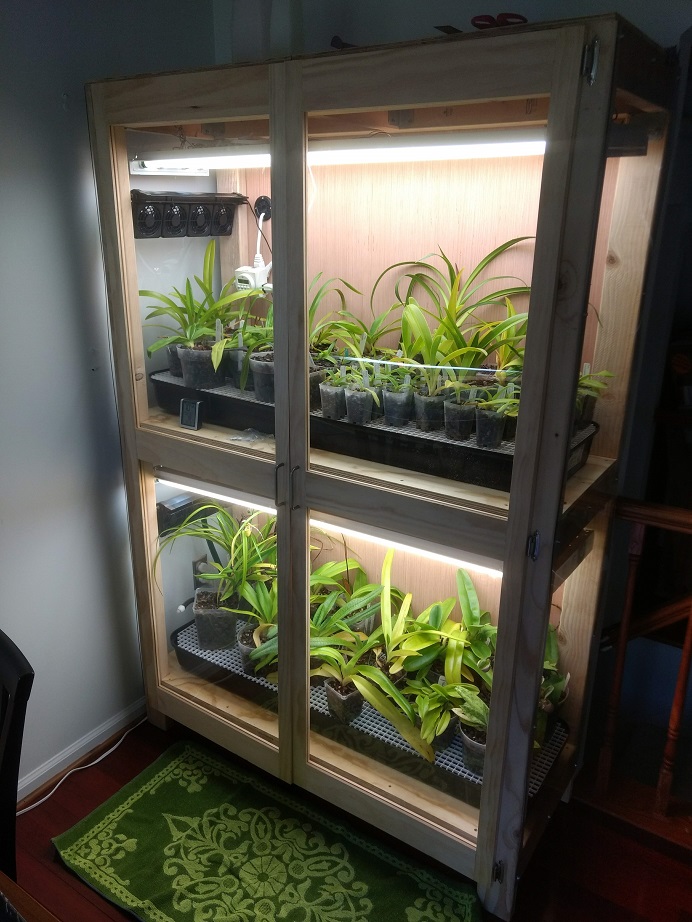
Nicely done! It looks like you gave this a good amount of thought as to what you needed before starting construction. Looks like they'll have a happy home. Do you have to remove them in order to water or can you just water them in place with the excess dripping into the trays?
The top tray drains into the bottom tray where I've got a small fountain pump. When the bottom tray fills up I run a fountain hose out the back door and pump it out. It takes several weeks for the bottom tray to fill up and about 10 minutes for the pump to do its work. Also, the drain on the top tray is at a level to leave about 2" of water to help with the humidity in the top section.
It looks great. There's just one problem ... not enough plants!
Can you give us an idea of what's involved in the construction in terms of cost, time, materials, and tools used?
I still have my seedling aquarium, so more plants will be making their way into the cabinet...
https://www.slippertalk.com/threads/aquarium-house-for-my-flasklings.47115/
Here's a materials list for the cabinet (prices are for 1):
7 - 8' 2x4s ($3)
3 - 10' 2x4s ($3)
4 - 6' 1x4 clear pine ($7)
1 - 4x8 1/2" plywood ($23)
1 - 4x8 1/4" plywood ($16)
2 - 4x8 1/8" acrylic sheet ($129)
30 - 90 degree strong ties ($1.50)
3 - 2 pack cabinet hinges ($3)
2 - cabinet handles ($3)
2 - aquarium fans ($29)
2 - flood trays ($44)
1 - grid for trays ($16)
1 - timer ($14)
1 - fountain pump ($25)
2 - 4' 4-bulb T8 light fixtures ($40)
8 - bulbs ($4)
1 - wire grommet ($9)
4 - extension cords ($10)
1 - hose fitting ($7)
Misc hardware: screws, hooks, chain (~$30)
So a total of about $800 (don't tell my wife) worth of materials, but I already had some of the stuff from my previous setup (e.g. lights, bulbs, hose fitting, 1 tray, etc). I could have shaved off some of the cost by making the sides out of 1/4" plywood instead of acrylic. But this is currently in the dining room, so it has to look nice.
The power tools I used were a drill, impact driver, circular saw, compound miter saw, table saw, jig saw, router (with table), and biscuit joiner. If you're good with a circular saw, you can do without the compound miter saw and table saw (but they make it much easier). I only used the router to cut a 3/16" notch in the door pieces for the acrylic to float in. If you redesign the doors or cut the notch with the table saw, you can do without the router. I only used the biscuit joiner on the doors because I didn't want to use any screws or other hardware that would be visible when completed (i.e. they're held together with only biscuits and glue).
It took me about 3 weekends to complete. If I had to make another one, I could probably do it in half the time since this was definitely a learning experience.
If my wife and I decide to keep it as a permanent piece of furniture, I'll probably do the sides in the same style as I did the door - with acrylic panels floating in clear pine frames. Then we'll have to decide on a paint or stain (and by we I mean her because I really don't have an eye for color).
--Stephen


